In today’s article we are going to talk about AutoCAD recovery manager. We all know about AutoCAD and how this software has changed our life drastically. If you want to learn more about AutoCAD you can check here. Autodesk’s AutoCAD is a household name nowadays, it is a tool which architects engineers, designer etc. use. It has numerous advantages but at the same time it has few drawbacks as well.
Talking about the major drop back, it is the error or the crashes. Whenever we are working on a project in AutoCAD, sometimes due to power supply or due to system crash, the software crashes and we loose all our data. But to save this, we have a tool known as AutoCAD Recovery Manager. And because of this reason, in this article we will explore more about this AutoCAD recovery manager and how it safeguards and saves us from major losses.
AutoCAD recovery manager is a total life saver not only for architects or designers, but for students as well who are working on this software. Power out or unexpected crashes can erase all data and our efforts, so there is an inbuilt feature in AutoCAD that helps us from these crashes. It automatically save and backs up the files so that we can work on AutoCAD peacefully .
How to apply the AutoCAD recovery manager:


See how Factovare helps factories digitize work
Watch the demo and contact us to try Factovare for your manufacturing operations.
Free Training Registration
Factovare Certified Manufacturing Excellence Professional (FCMEP)
Trainer: Founder of Factovare and Know Industrial Engineering
Learn directly from the person behind both platforms.
What you will learn
Enter your details and verify email OTP to reserve your seat.
Step 1: Enter your name and email address, then click Send OTP.
Ahead are the steps to apply the AutoCAD recovery manager and backup our files .
So, first we launch the AutoCAD software on your system. And then type “OPTIONS” and a drop down menu will pop up giving us “Options” button. Click on that.

If you don’t want to use keyboard, you can also use your mouse. For that, you can point your mouse to the icon of AutoCAD present at the top left corner of screen.

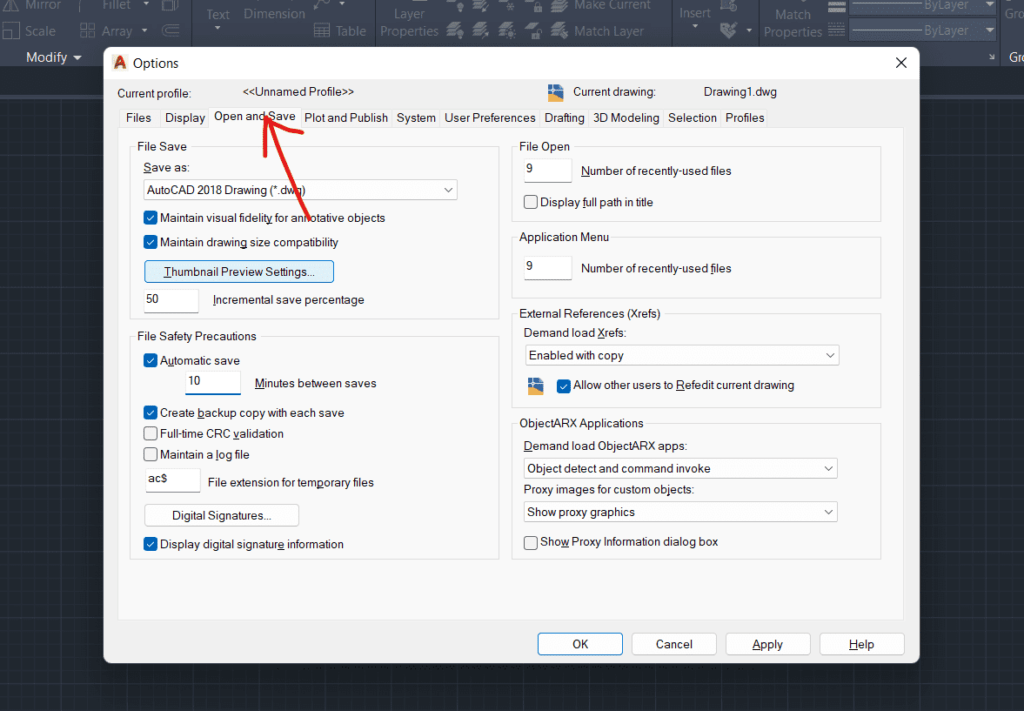
Click on the “Options” and a new window will appear.

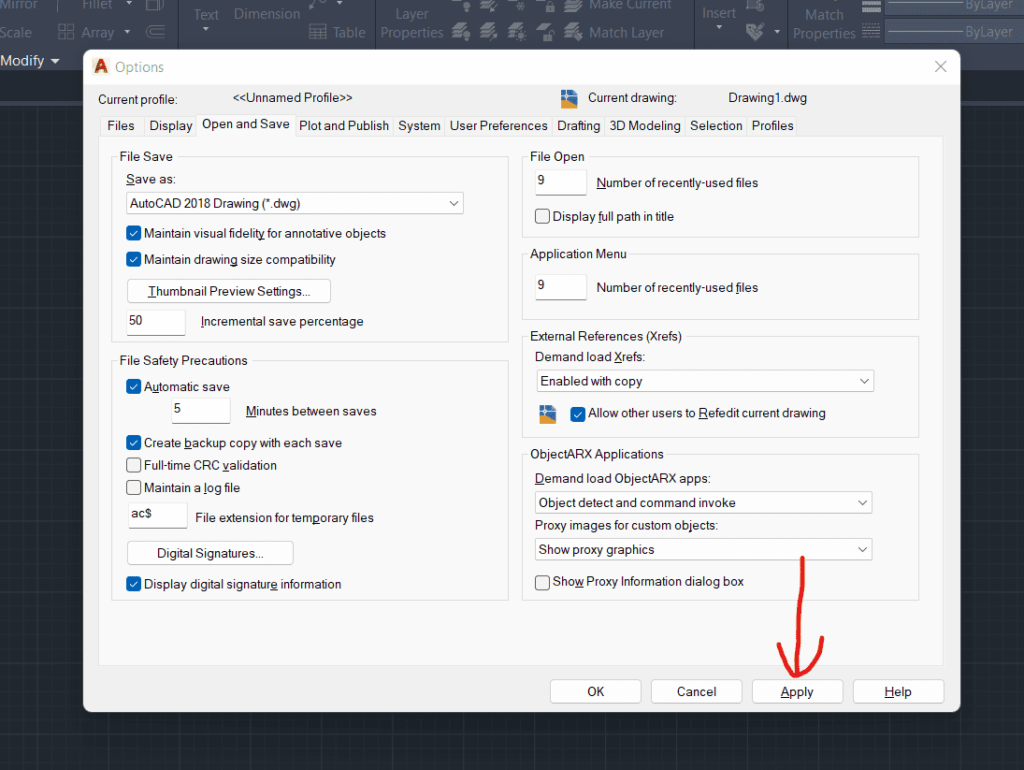
Click on “Open and Save” option
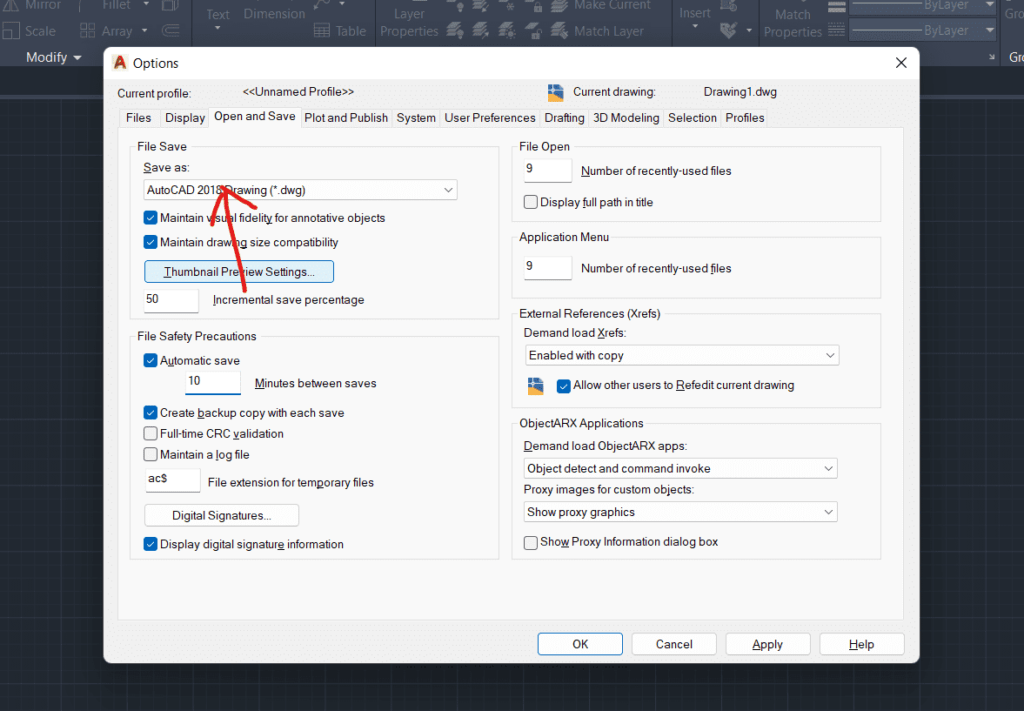
Here you can change the name of the file as well. Just go to the “Save as” option and below it start typing the new name of the file
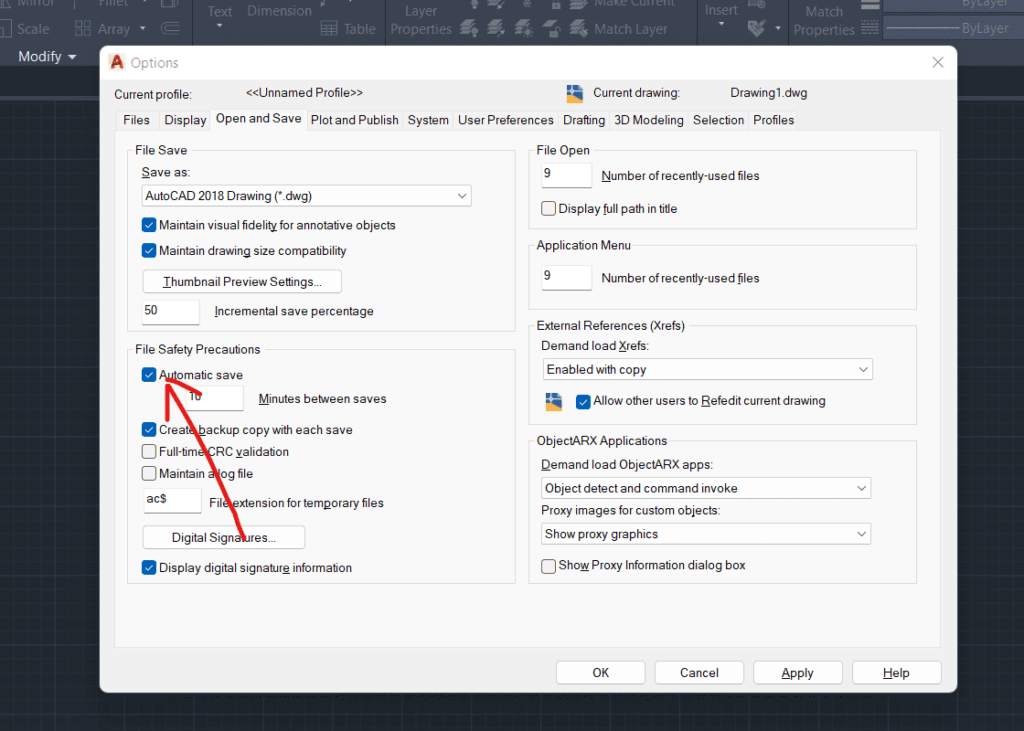
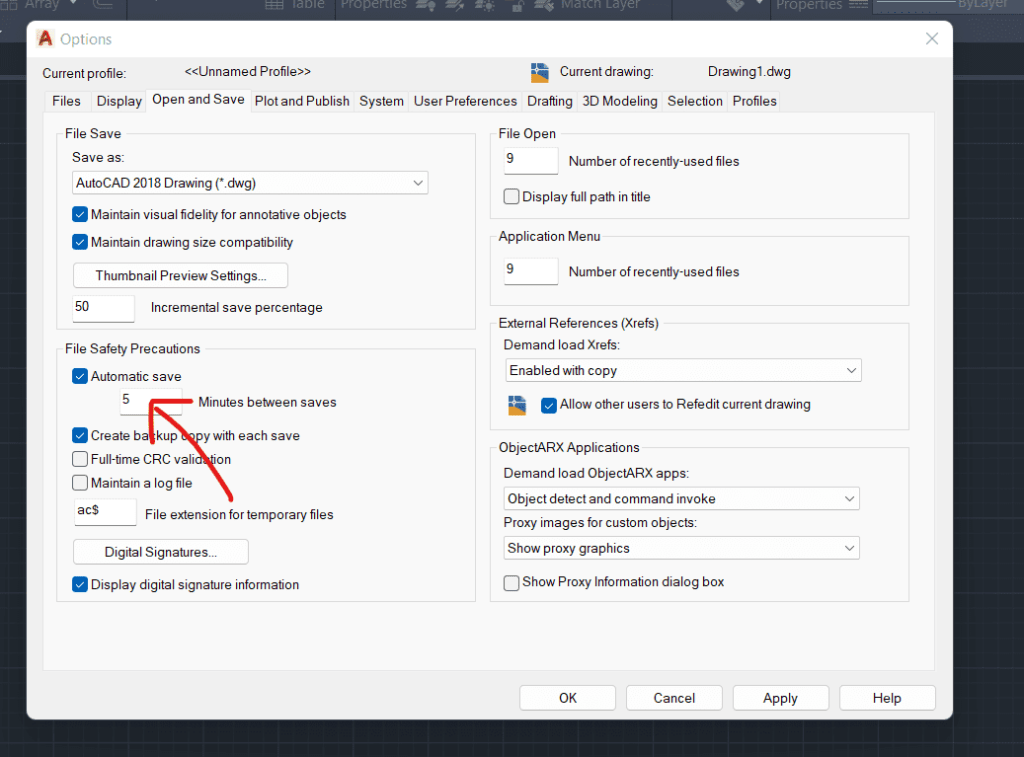
Under the file safety precautions, we have the “Automatic save”. We have to check this box by simply clicking on the the small box, so that a files get saved time to time.
Below the automatic save option we have “Minutes between saves” .in this option you can type in the minutes after which you want your AutoCAD to save your files. For example, I will change the minutes from 10 to 5 minutes, which means after every 5 minutes, whatever the work I have been doing that will keep on saving.
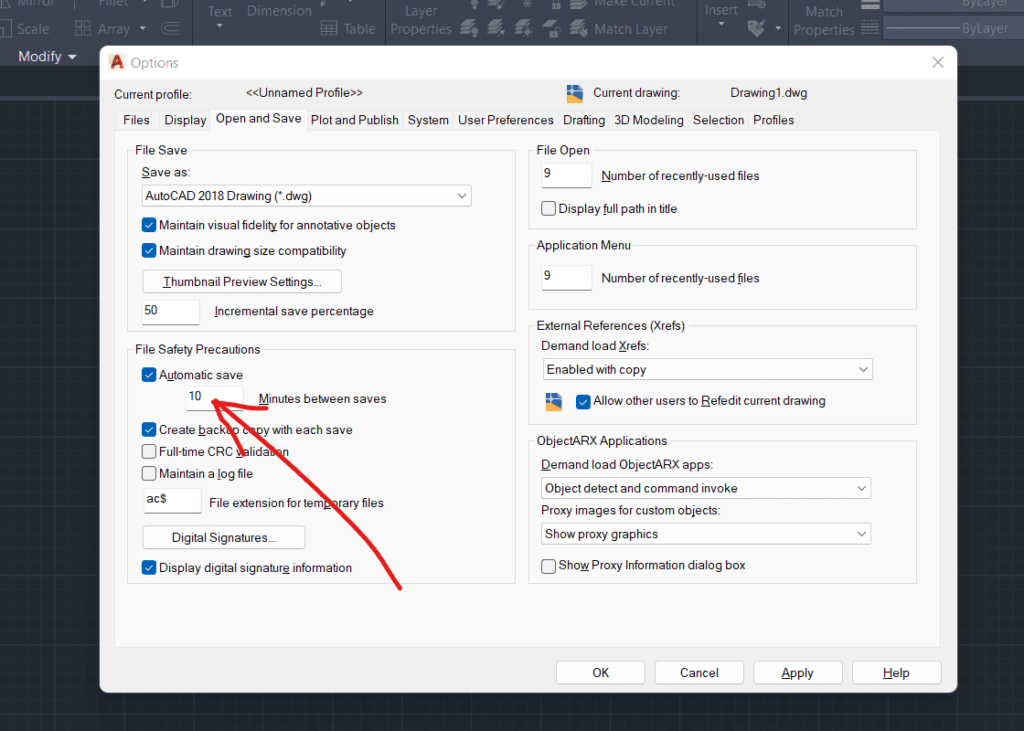
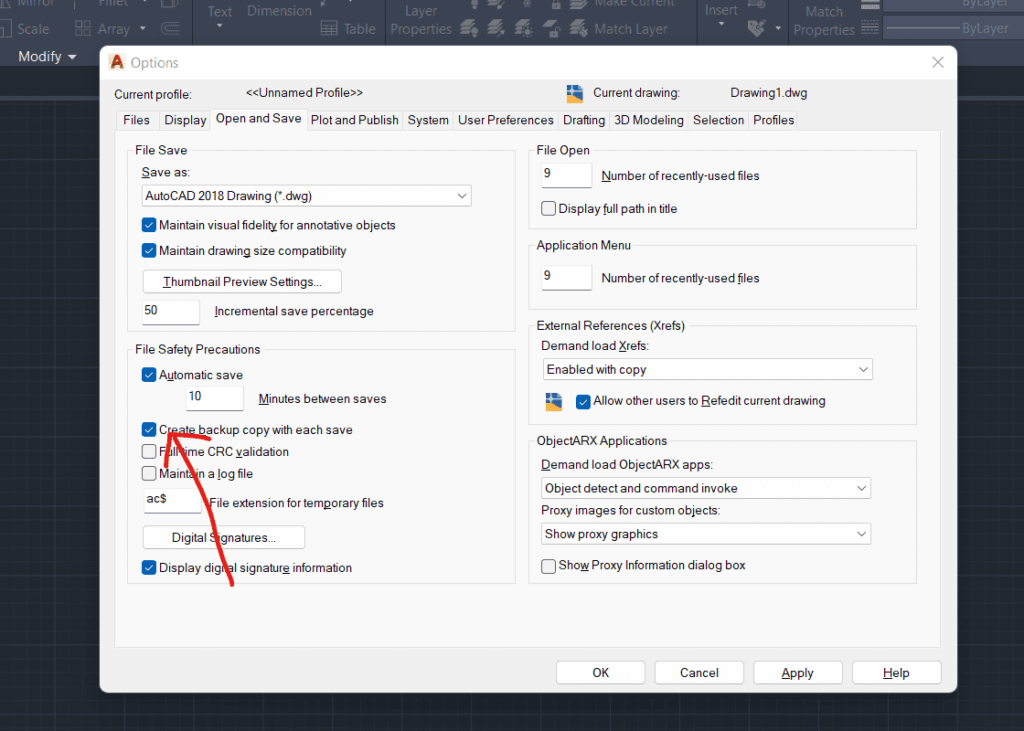
Below the automatic save button we have “Create backup copy with each save” we have to check this box. It will help us in creating every saved copy, which means after every 5 minutes, a copy would be saved.
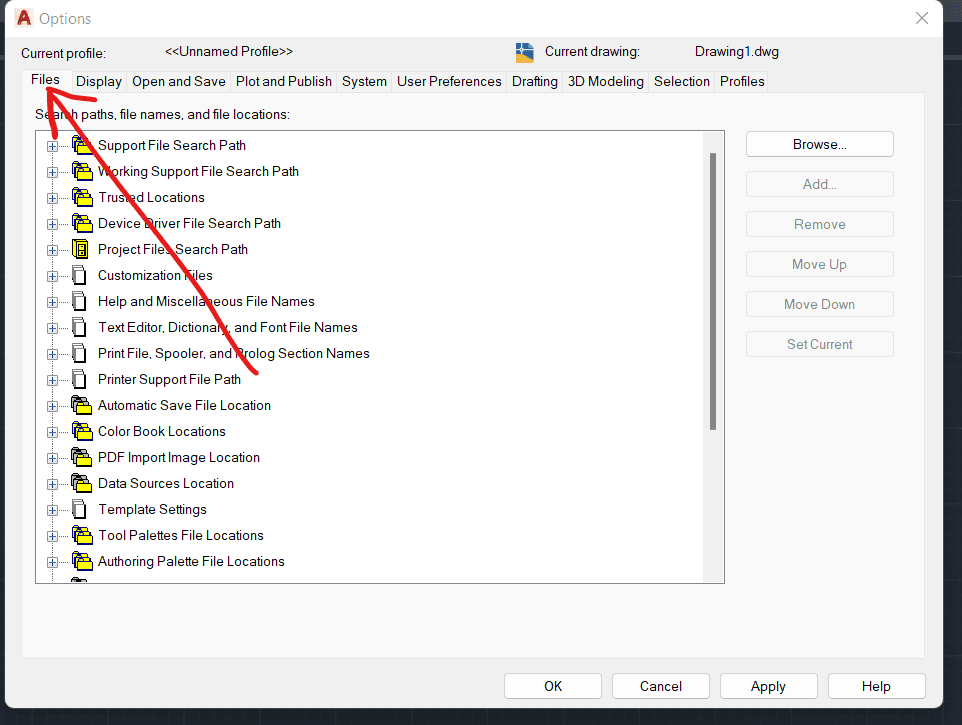
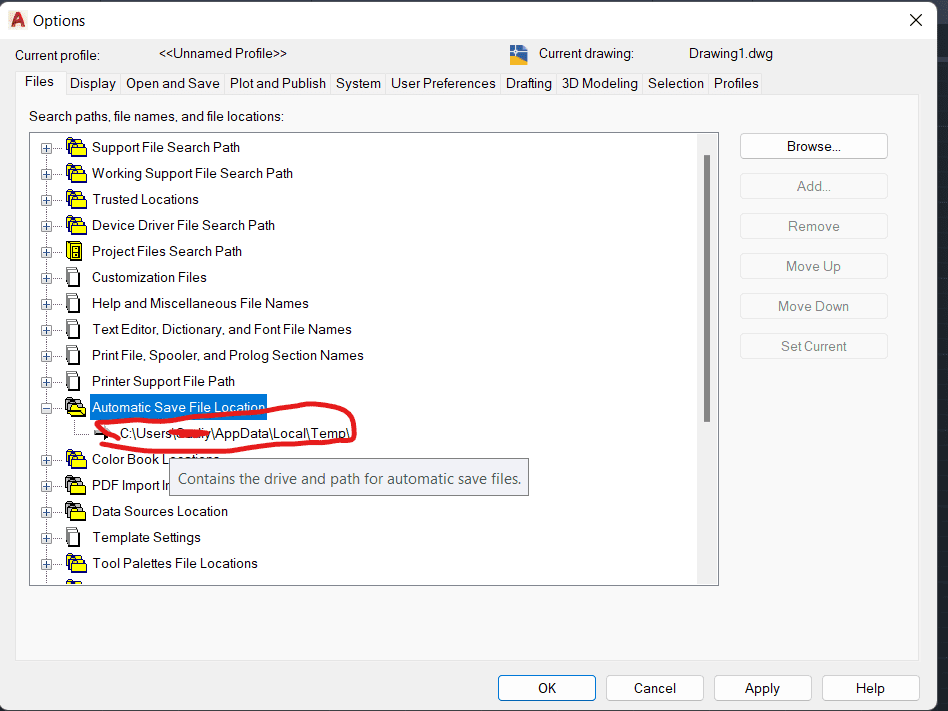
And if we want to change the location or want to see the location of this backup files, click on the “Files” option
After that, click on “Automatic Save file Location” and you can see where the files have been stored or will be stored.
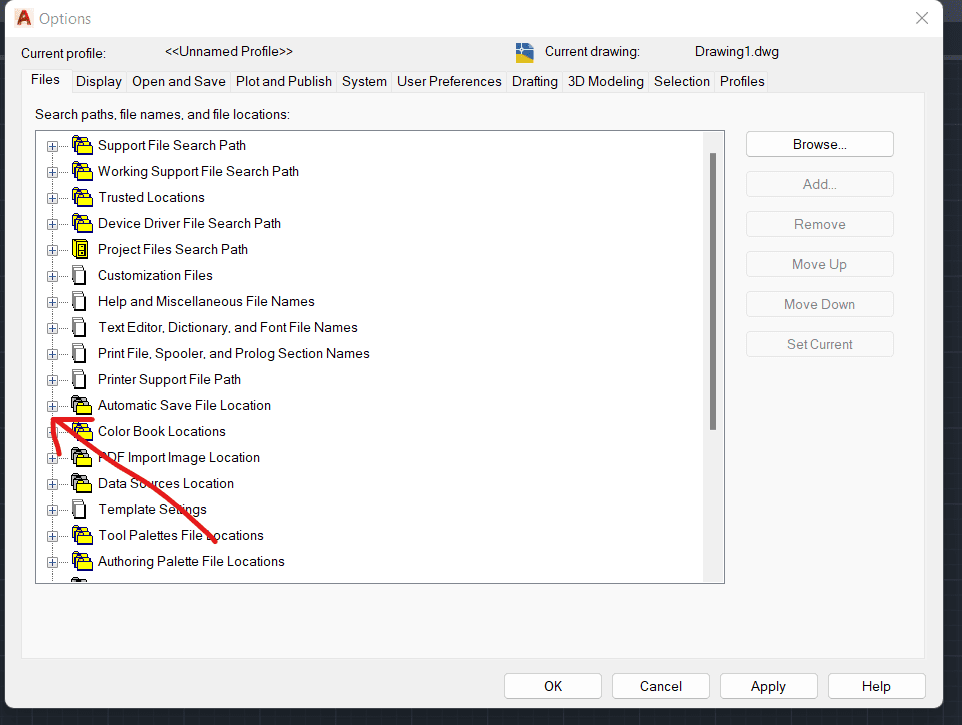
Moreover, if you want to change the location of your backup files, click on the file location and on the right hand side you will have the option as browse
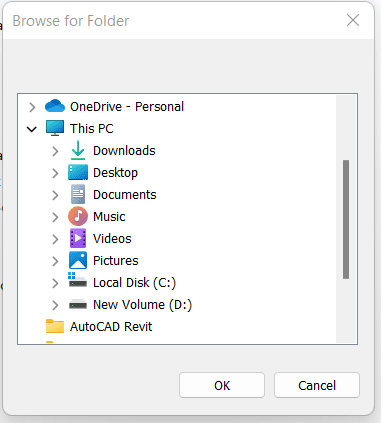
Click on that or you can just double click on the file location. After that you will get at drop down menu where you can see different locations of your system like, desktop, documents, pictures, videos etc. Wherever you want to see your back files you just have to click on that and press OK
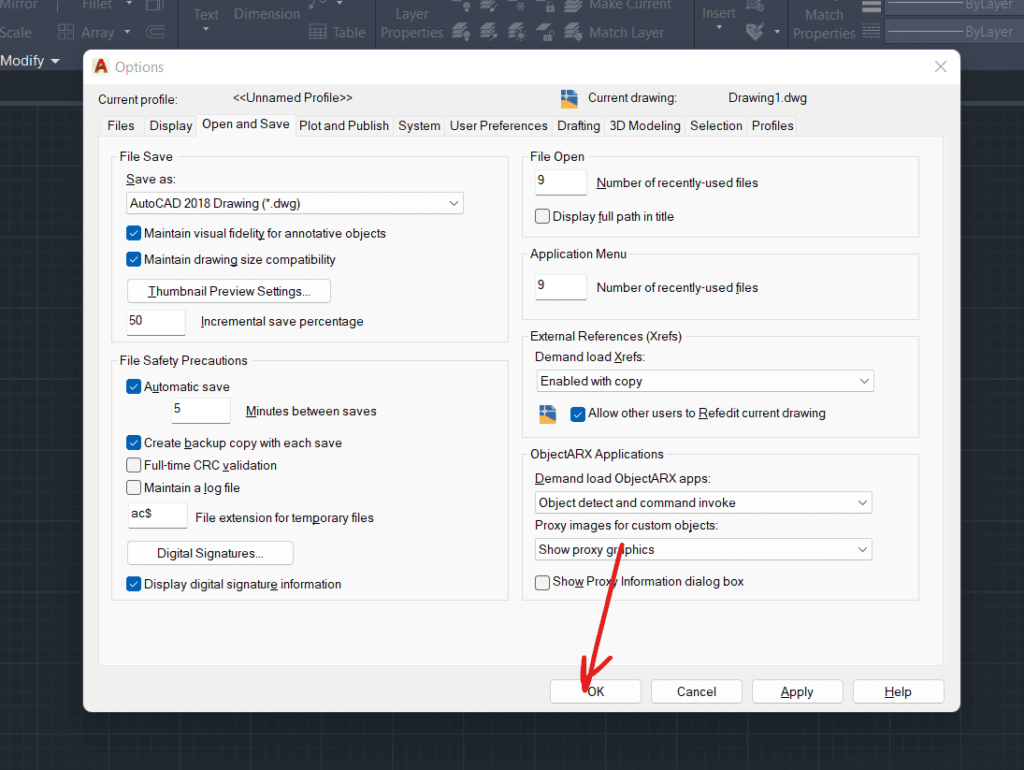
Then click on “Apply” and then “Okay“.
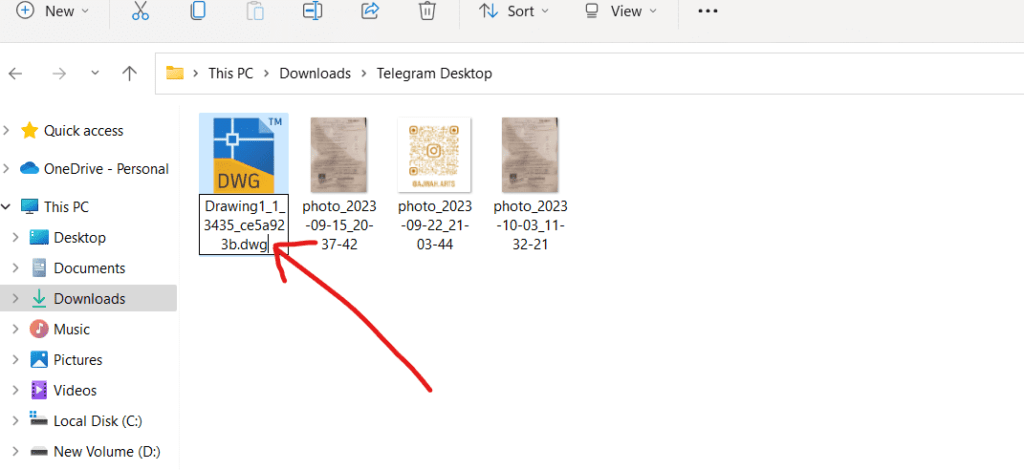
Moreover, if you now want to access your backup file, just go to the location that you had selected
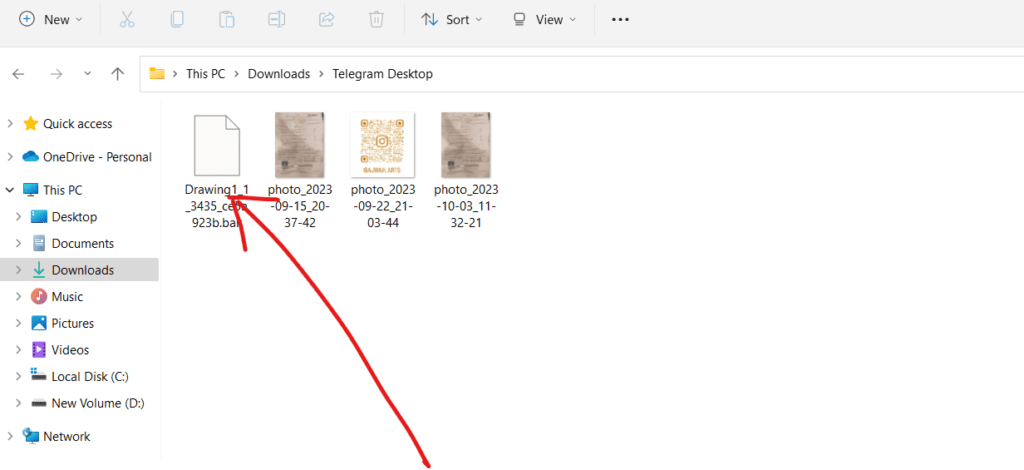
Now here, you have to change its extension by “.dwg”
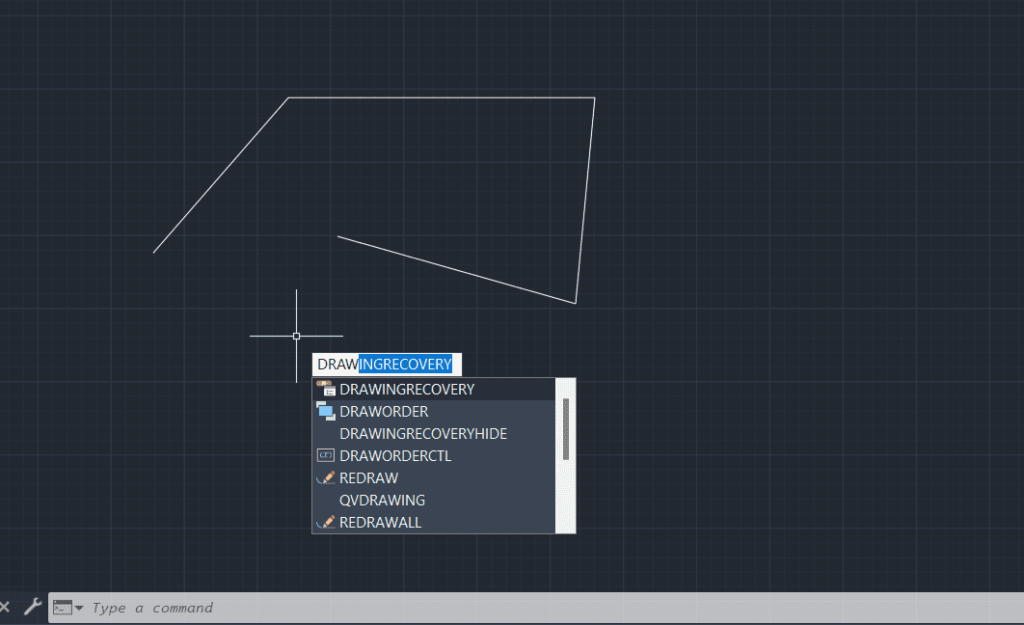
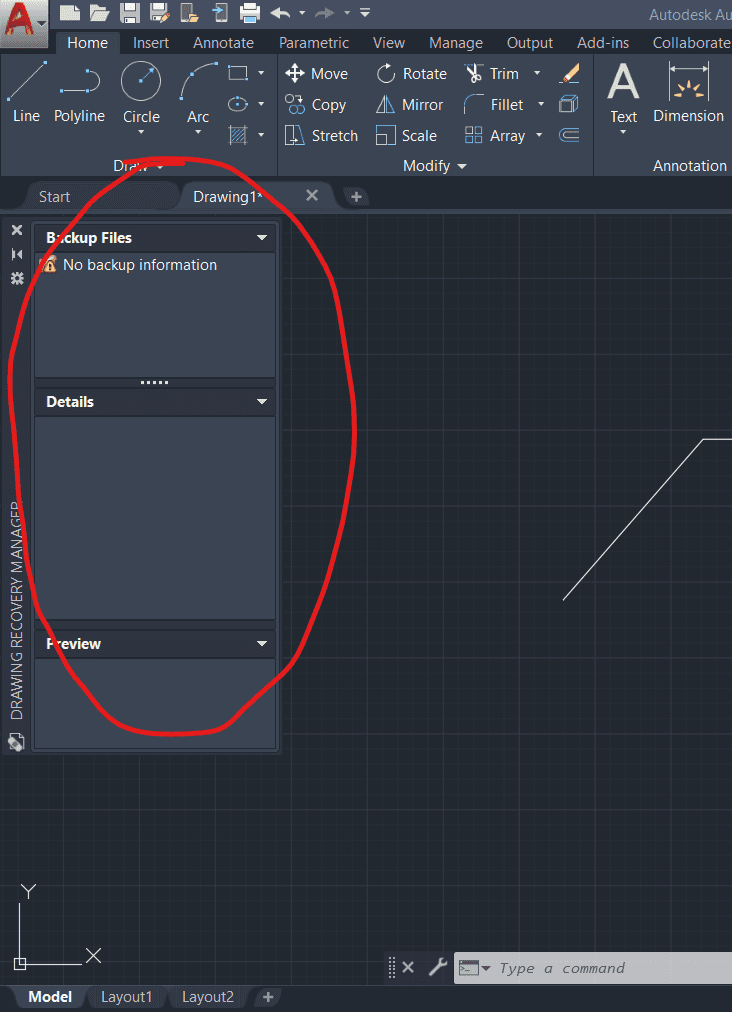
You can also access your backup files from the AutoCAD software. Just type “Drawingrecovery” and press “Enter”
Else you can get this option from the icon as well. Just click on the AutoCAD Icon present at the top left corner of the screen. From there, select ” Drawing Utilities“

Then click on “Open the Drawing Recovery Manager“
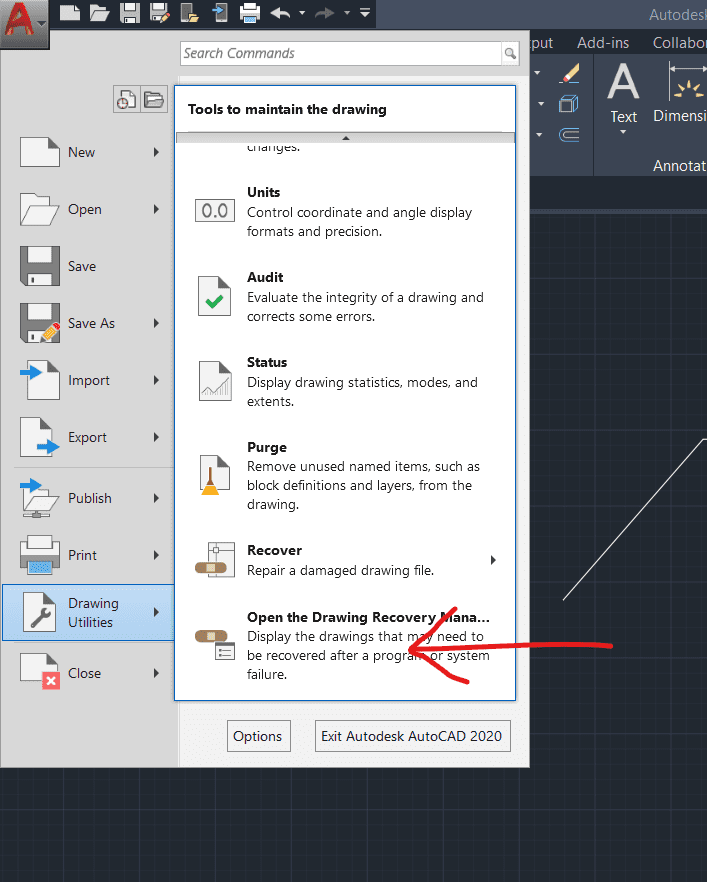
You will get the Drawing Recovery Manager tab from where you can access all your backup files.
And now your each and every work would be saved after every 5 minute interval, so now you can work peacefully. And now you don’t have to think about losing your data or some crash because your every 5 minute work would be saved.
Thank You

Now or Never
We’ve got your back on your manufacturing journey — Stay in touch
Follow us for step-by-step guidance, templates, and insights that save time and reduce mistakes.
Know Industrial Engineering Platform – Helping manufacturing industry professionals worldwide since 2019

Great information